How to Turn an Old Android Tablet Into an Auto-Updating Digital Photo Frame

When’s the last time you touched your Android tablet? If it’s been more than a year or so, it might be time to find some other use for that thing—after all, it’s not like it’s getting any software updates, right? Here’s how to use it as a digital photo frame.
You could recycle it or use it as a kid’s computer or any number of other useful things, a photo frame is today’s project—and not a lame digital photo frame, like you got at the office Christmas party back in 2008. We’re talking about a high-resolution, Wi-Fi connected, auto-updating photo viewing experience. And more importantly, it’s one you can set up at a family member’s house, update remotely, and never have to think about again.
What You’ll Need
To do this, you’ll need just a few simple things:
- An Android tablet: obviously. And ideally you’ll want one that you don’t have a use for anymore. If for some reason you want to buy an Android tablet specifically for this purpose, you can get super cheap models for under $100.
- A tablet stand: because you need some way to display your project when you’re done. I like this one from Anker ($10), I’ve used it for years.
- A tablet charger: because you’re going to plug it in forever.
- A Wi-Fi network: you’ll want one for auto-updating the pool of photos from the web.
- Got all that? Great, let’s go.
Step One: Put Your Photos On a Cloud Service
To start, you need to get all the photos you want together and stick ’em on the internet. I prefer Dropbox for this option, but the app we’re going to use also supports Google Drive, Google Photos, and local storage servers. If you already use something else, like Facebook or Flickr, you’ll need a different app for your tablet…but surprisingly, a lot of the apps on the Play Store kind of suck. (Suppress your gasps of shock, please.) So it might be easiest just to use Dropbox here, even if you don’t use it for anything else.
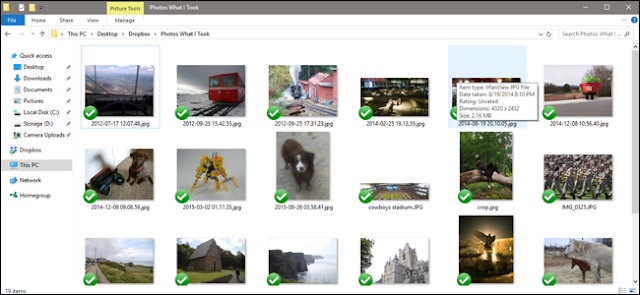
You’ll want to make a single, specific folder in your Dropbox account (or other service) dedicated to the photos for your viewer. Then place the images you want to use in the folder. This is easiest to do on a desktop running Windows or macOS with the Dropbox syncing program, but you can also do it through a desktop web browser or even the Dropbox mobile app, if all your photos are on the device (or if you can download them there). But seriously, it’s much, much easier on a desktop.
If you’re running into storage limits for your photos, you can save tons of storage space by resizing them to the resolution of the tablet. Having the photos on cloud storage at full resolution isn’t really practical anyway, since your tablet can probably only display a fraction of that size, and even the stingiest of online storage plans can hold thousands of photos at 1080p resolution. Here’s a handy tool for batch resizing photos on Windows, and here’s one on macOS.
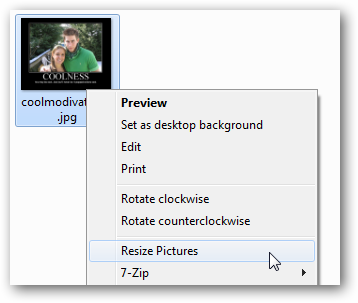
Once you have all the photos you want in the right Dropbox folder, it’s time to switch over to the tablet itself.
Step Two: Download and Set Up Fotoo
To turn your tablet into a photo frame, I recommend Fotoo, a frame app on the Play Store that has a 4.3-star review rating. In my opinion, it has the optimum combination of features and ease of use. Oh, and it actually works, which I can’t say for most of the dozen or so apps I tried during my testing.
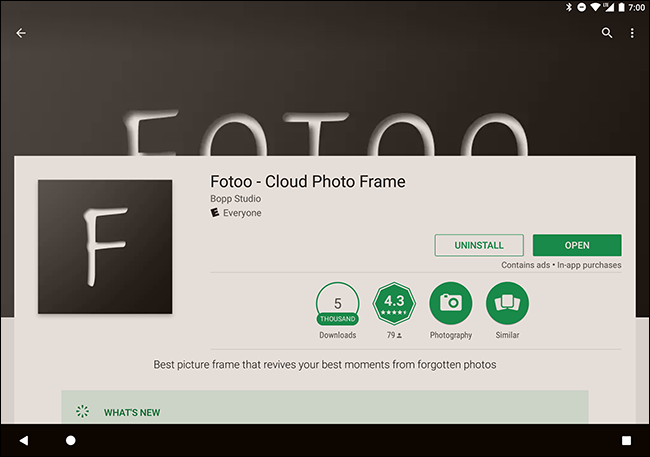
Anyway, download and install Fotoo. It’s free, but there’s a $2 upgrade to remove advertising (only in the menus) and add some extra transition options.
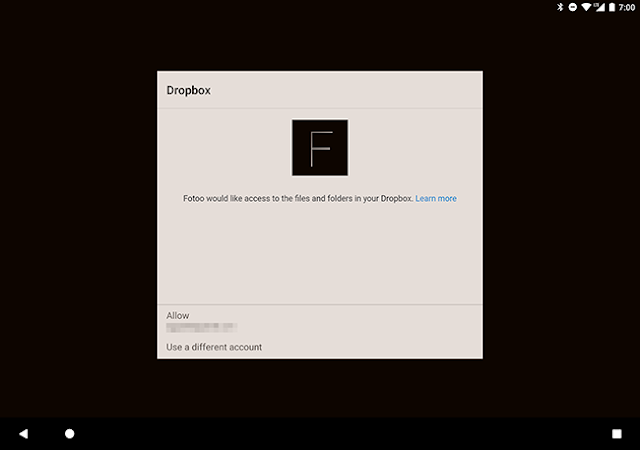
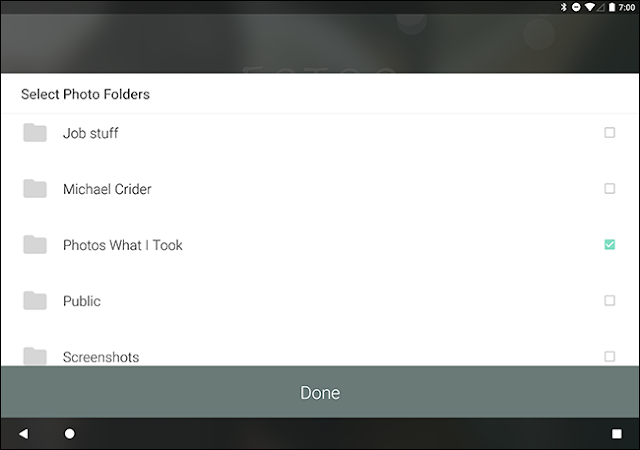
From the main menu, tap Dropbox, Google [Drive], Google [Photos], or Local [storage server]. Log in with the relevant account and you should be able to access the folder you created in Step one. You can also add any other folder on the account.
Step Three: Set Up Charging Tools
Now press the “Back” button until you get back to the main Fotoo menu page and tap “Settings.” There’s a lot of stuff you can tinker with here, and you should—it’s all pretty easy and self-explanatory. But the one setting you really want to enable is under “Charging.”
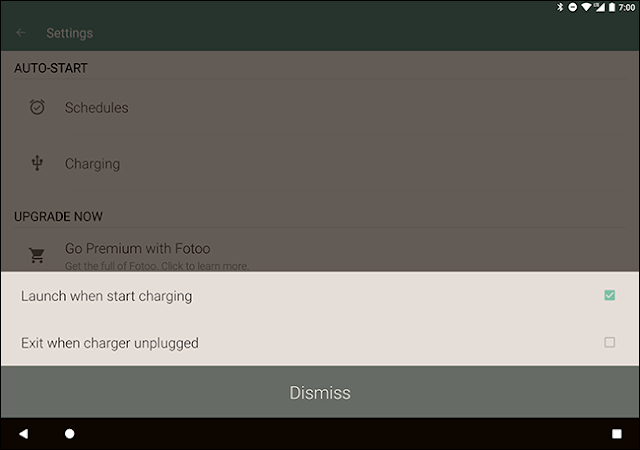
In the mini-menu, tap “”Launch when start charging.” Now when you plug in the tablet (which is how it’s going to spend almost all its time as a photo frame), Fotoo will automatically start and begin its slideshow.
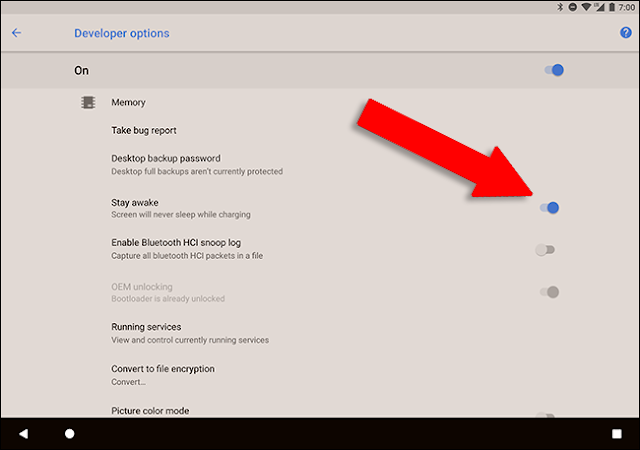
But there’s one more thing you need to take care of. Slide down from the top of the screen to open the notification bar, then tap “Settings” or the gear icon. If you haven’t done so, you need to enable Developer Options. To do so, Head to System > About Tablet, then tap on the item named “Build number” over and over again until you see the message “You are now a developer!”
You’re probably not a developer. It’s fine, your tablet doesn’t know that. I won’t tell if you won’t.
Go back one or two menus until you see “Developer Options,” and tap on it. Towards the top of the list you’ll see an option for “Stay Awake.” This will keep the screen on for as long as you leave the charger plugged in. Enable it.
Step Four: Display Your Tablet
OK, you’ve got your app all set up, and your tablet’s screen is set to stay on as long as it’s charging. Before you finish, make sure the place you’re planning to put the tablet has Wi-Fi access, and the tablet itself is up and running on the local network. You might also want to turn the volume for notifications all the way down to zero—nobody likes a noisy picture frame.

Now just set the tablet on the tablet stand somewhere decorative, and plug it into the charger. Fotoo will launch automatically. Adjust the brightness to your liking, and you’re done: you shouldn’t need to touch it ever again. Even if the power goes out and it loses its battery charge, you can just turn it on, plug it in, and Fotoo will once again launch. The “stay awake” developer option will keep the tablet on for as long as you like.
Whenever you want to add photos to the tablet’s running slideshow, just drop them into the Dropbox/Google Drive/local server folder you created in Step one, and they’ll get folded into the slideshow.
EmoticonEmoticon